¶ Introduction
¶ What is Keycloak
Keycloak is an open source authentication solution based in OpenID-Connect / OAuth 2. It also provides a whole lot of features out of the box such as SSO, independent realms, integration with user federations (other OIDC providers, LDAP, Active Directory), OTP, specific policies for different realms etc. It is easy to install (you can get the Docker Image in quay.io/keycloak/keycloak:latest).
¶ Installation
Let's start with the Compose file and go from there:
version: '3'

services:
  keycloak:
    image: quay.io/keycloak/keycloak:latest
    container_name: keycloak
    restart: always
    command: start-dev
    ports:
      - 8080:8080
    networks:
      - services
    environment:
      - KC_DB=postgres
      - KC_DB_USERNAME=keycloak_usr
      - KC_DB_PASSWORD=********
      - KC_DB_URL=jdbc:postgresql://postgres:5432/keycloak?ssl=allow
      - KC_HOSTNAME=http://keycloak.dev.local:8080/
      - KC_RUN_IN_CONTAINER=true
      - KEYCLOAK_ADMIN=admin
      - KEYCLOAK_ADMIN_PASSWORD=admin

networks:
  services:
    name: services
    external: true
You need to have an up and running postgres server prior to running the above, with a database called keycloak already created. You should also change the appropriate KC_DB_ environment variables above so that it matches your configuration - and remember that the KC_DB variable is not the database name, but rather the database type, which should remain postgres.
Also, note that the KC_HOSTNAME is pointing to a domain that will probably be different in your environment. It should match the exact base URL (including port) that you are going to use to login and configure your clients.
Finally, note that we are running command start-dev, which indicates that this is a development instance, which has less security restrictions than a production instance. The above should be enough to get you started.
¶ Initial Configuration
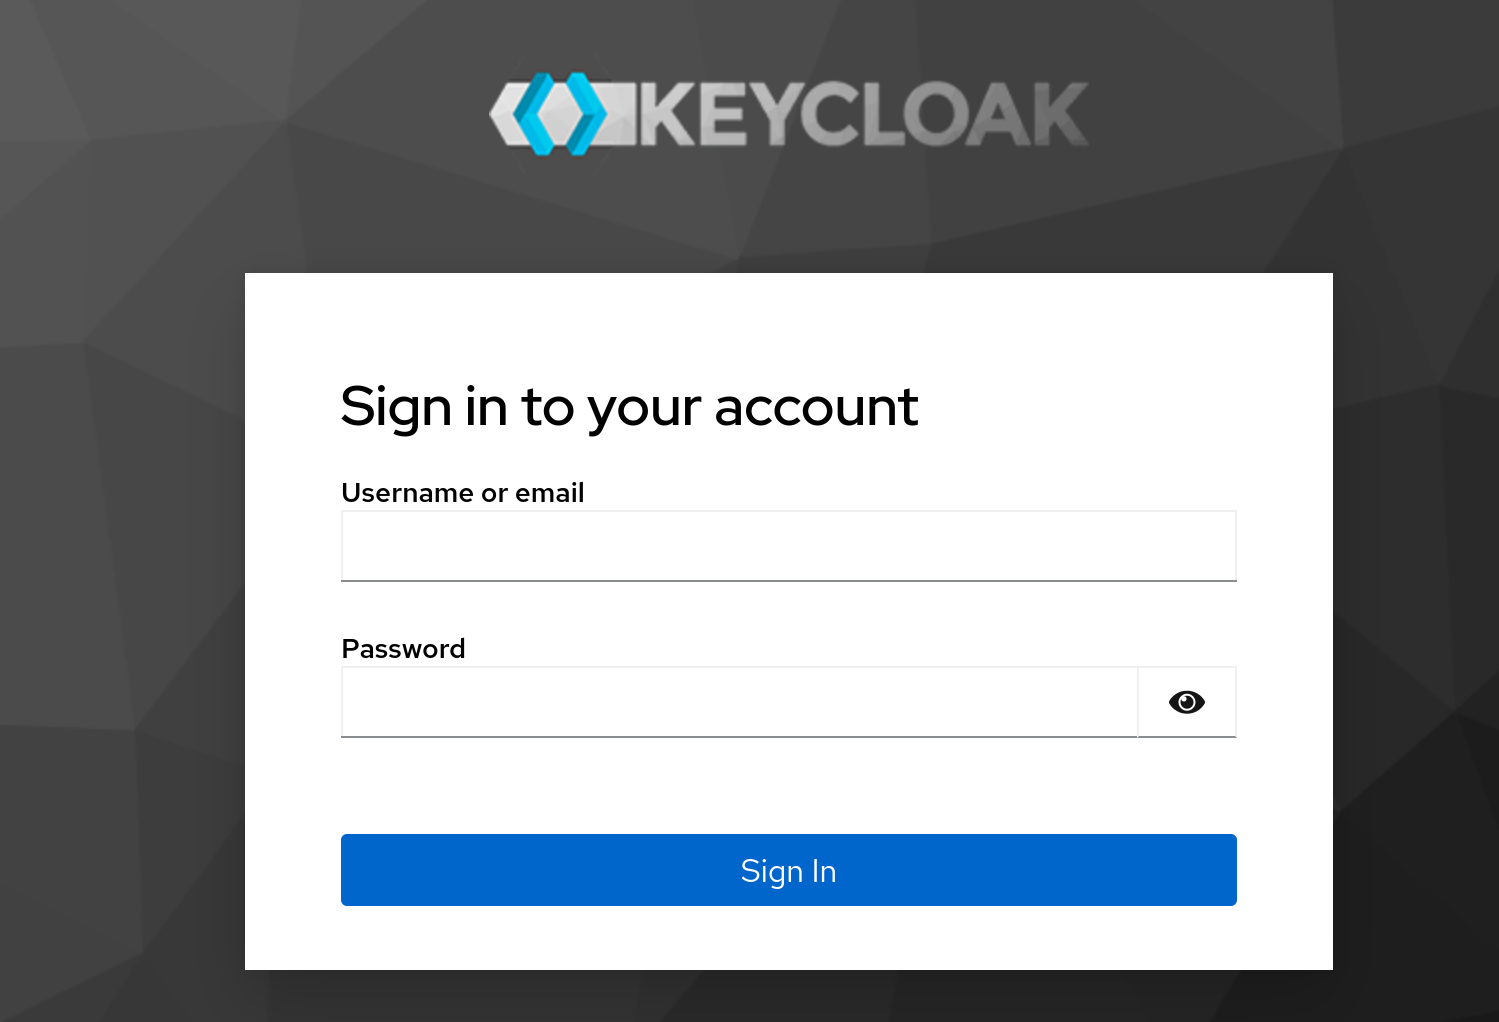
Supposing the same KC_HOSTNAME as in the compose file above, you should now be able to access http://keycloak.dev.local:8080/ and see the login screen, something similar to this:
The first login should be done with the initial user / password configured in the compose file above -
admin/admin. Don't worry, this is just a temporary user, and you should get a message saying to that you should create a proper admin user right away and get rid of this one when you're done.
First thing to do is to create a proper new admin user going to Users > Add User.

Fill in the user data (username, email, name etc.) and click Create. You can mark the email verified option right away, just make sure your email address is correct.
Now, set a password to your user in the user details going to the Credentials tab. Create a new password credential. Since you are going to use this user right away, unmark the temporary option and set your password. Finally, in Role mapping, click on Assign Role. In Filter by..., choose Filter by realm roles. Look for the admin role and assign it to your user.
Now that your new admin user is ready, logout from the temporary admin user and login with your newly created user. Now, go back to Users and find the old admin user. Select it and click on Delete user. Done, your Keycloak server is ready to be used!
¶ Keycloak Main Concepts
¶ Realms
When working with Keycloak, realms are the top level elements. Think of each realm as a totally aparted environment that contains users, groups, roles, clients. etc. They enable using Keycloak as a multi-tenant authentication solution (i.e., you can have your company's internal realm for internal systems, integration for authenticating your integration clients, users for your customer facing users and so on. The data from one realm is not accessible from other realms, although you can integrate one realm as the provider to another realm (more on that later). But think of them as isolated user spaces.
¶ Tokens
Keycloak uses Openid-Connect, which is based on OAuth2. It thus provides authentication and authorization capabilities for both protocols. The tokens from Keycloak are not opaque. This means it can be decoded for gathering useful information about the user and the granted access. One benefit of this is that you can have a "local" verification of the token, not needing to make a new call to the authorization server each time - as long as your app has the server's trusted public key cached, it should be suficient to trust in its content.
Be aware: the OAuth2 spec does not say that a token must be not opaque, so relying on that might be an issue if you decide to change your IDP in the future.
The basic successful authentication response from keycloak comes in form of tokens - usually, you get an id token, an access token and a refresh token. Each one has a different meaning, but you usually want the access token to be provided for validating access to your application and keep the other two on the server side.
The id token is meant to provide proof that the user was authenticated, with basic profile information (username, first name, last name, email etc). The access token is usually the one your app should care more about. It also contains most data the id token has (although it is not a recommended practice to rely on the access token for that), but it has some more fine grained access information such as app roles, expected audience etc. - usually, it is short lived, so that you don´t rely on it for long periods in case it is compromised. Finally, the refresh token has a longer expiration time. It is supposed to be kept in a trusted place (i.e., on the server-side of your application) so that it can automatically and transparently get a new access token from the auth server when the current one is expired. Of course that, in case the session was revoked (i.e., it was detected that an access token was compromised, so the admin revokes it), you won't be able to refresh the token. This is a neat way to balance local token verification without sacrificing too much the benefits of a centralized auth server.
¶ Roles and Groups
Roles and Groups in Keycloak behave pretty much the same way as in any well build RBAC platform. You can create different roles, as granular as you want (i.e., access to one specific resource or one-role-fits-all, depending on what you need). Then, you can create different groups and assign the set of roles for that particular group (i.e., Admins group has read and write roles, whereas Reports has only read roles specifically for reports).
Keycloak allows you to create realm roles (i.e., "global" roles) or roles specific to your application (in its client). Those will be provided once the user logs in in the decoded access token, and can be used by the app to verify access.
Another nice feature of Keycloak is that it allows you to create subgroups inside a group, in which case the inner group inherits all the roles from the parent group, also allowing you to add new roles. Let's say you have a Users group with all read roles. You could add an Admins group as a child for it and add just the write roles for it - the read roles will be inherited, and Admins would have full access. This is a nice feature, but should be used with caution to avoid hard to understand RBAC schemas.
¶ Clients
Clients represent roughly the different applications that are allowed to access your realm. Usually, you should create one client per application in your realm. Each client has its own id and secret, which will be used by the application to start an authentication flow in Keycloak.
The use of clients allows you to have fine grained configurations such as the redirect URL when login is successful, roles specific to your application, what information is provided in the access token, login policies, etc.
¶ Integration
¶ Configure an Existing App to Use Keycloak
There are several applications that support integration with Keycloak (or a generic OpenID-Connect provider) out of the box. I covered a few of them in other pages, such as Portainer, OAuth2-Proxy or Vault, so you can see how they individually were configured in them.
The general idea is to create a new client in the desired realm specific for your application, with its own client ID, then enable authentication. Then, you configure the application's redirect URL - each application uses a different one, and you probably have some kind of hint in the applications OIDC configuration page of what it is. It is important that the redirect URL is rigorously equal to what is going to be used in Keycloak.
On the application side, you should configure the client ID, secret and redirect URL the same way it is in Keycloak. Then, you need to configure Keycloak's URL. Again, all URLs must be rigorously the same as Keycloak provides. Some applications use the auto discovery URL (something like http://{keycloak_server}/realms/{realm}/.well-known/openid-configuration). In others, you need to manually configure all of the necessary URLS, but don't worry: you can access the auto discovery URL yourself and get all the URLs you need.
¶ Integrate a New App to Keycloak
I've created a Python sample application to show how to integrate a FastAPI application with Keycloak. The source code is available at my Github repo. It's by no means a complete or perfectly executed application, consider this more a proof of concept that doesn't care as much for usability and beauty  .
.
To run it, first you need to install the dependencies:
pipenv install --dev
If you don't have
pipenvinstalled in your environment, you can install it by runningpip install pipenv.
Make sure you create a client for your app in Keycloak. If you are using http://localhost:8000/ as your app's URL, the redirect URL in Keycloak should be http://localhost:8000/auth/redirect. Also, you need to create two roles in your client: read-data and write-data. Then, create two groups with the following roles associated:
fastapi-keycloak-read- assing theread-datarole to it inRole mapping.fastapi-keycloak-write- assing bothread-dataandwrite-datainRole mapping.
Add your main user to the fastapi-keycloak-write group, and create another user that doesn't belong to any of these groups.
Now, you need to create a .env file for your environment in the root of the project (you can use .env.example as well, just copy it to .env and edit it):
APP_FORCE_HTTPS=false

KEYCLOAK_SERVER_URL=http://localhost:8080/
KEYCLOAK_CLIENT_ID=CLIENT_ID
KEYCLOAK_CLIENT_SECRET=CLIENT_SECRET
KEYCLOAK_REALM=internal

KEYCLOAK_ADMIN_CLIENT_ID=ADMIN_CLIENT_ID
KEYCLOAK_ADMIN_CLIENT_SECRET=ADMIN_CLIENT_SECRET
KEYCLOAK_ADMIN_REALM=master

REDIS_HOST=localhost
REDIS_PORT=6379
This app uses an unauthenticated
redisserver for caching the user session info. If you don't have Redis running, you can use Podman / Docker to spin a new instance:docker run --name redis -p 6379:6379 -d redis
APP_FORCE_HTTPS should be false, unless you intend to run it in an HTTPS environment. The KEYCLOAK_ (without the ADMIN_) entries should match those from your Keycloak client. The KEYCLOAK_ADMIN_ ones enable a feature for being able to add an user to a realm group to exemplify access management through Keycloak's management API. If you want to test it, use the admin-cli client info from your master realm (client id will be "admin-cli", and you can grab the secret from the credentials tab).
Once everything is set, you should now be able to execute the app:
pipenv run fastapi run ./main.py
¶ Under the hood
This is how the application is structured:
routers/: These are the application endpoints.api.py: The API endpoints that should be protected from unauthenticated / unauthorized access.auth.py: The authentication endpoints.default.py: The root (/) path. This should just redirect the user to theauth/loginendpoint, which in turn will redirect the user to Keycloak's login page.
services/: The application services.auth.py: Authentication services.keycloak.py: Keycloak admin services for demonstrating Keycloak's API abilities.
static/: The application HTML page.utils/session.py: Several utilities used to handle session login / logout.
¶ How it works
The first function of interest is in routes/auth.py, which is login_redirect. It will use the AuthService.login_redirect method. This method uses the KeycloakOpenID.auth_url method to generate the redirect URL for Keycloak login, setting parameters such as the apps redirect URL on successful login, the scope and other things.
Once the user is authenticated in Keycloak, the redirect function in routes/auth.py is called. It receives a code from the Keycloak server in the URL query, which will then be used to get an access token from Keycloak (think of this as a two way handshake). Once we get the access token, we set it as a cookie, so that this access token is provided to the application in every new request. Also, note that we are calling save_session_data in AuthService.get_access_token. This will save a few things that we will use later in Redis.
Now, we are ready for the last redirect, which is to send the user to the actual home page in pages/home.html. This page will use javascript's fetch to validate the user and get user information, like the first name:
¶ The Session
In the utils/session.py file, there's a function called session_data. This function is called every time a user makes a new request that requires an authenticated user. It does quite a lot of things: validates the token using the python-keycloak library; if the token is expired, tries to refresh it with Keycloak; verified that that token has already stablished a session within the application (which should be available in redis); finally, it returns the saved session data.
This function is used as a dependency injection for the verify_role function in the same file. The later validates that the user has a given role, and fails if the user doesn't match the required role. This function is also used as a dependency injection in the API router (check the api_router module variable in routers/api.py). This means that every route under this router requires the read role (at least) before being able to proceed.
There's also the add_user_to_group function, which required the write role. Let's explore that.
¶ Keycloak API for adding a user to a group
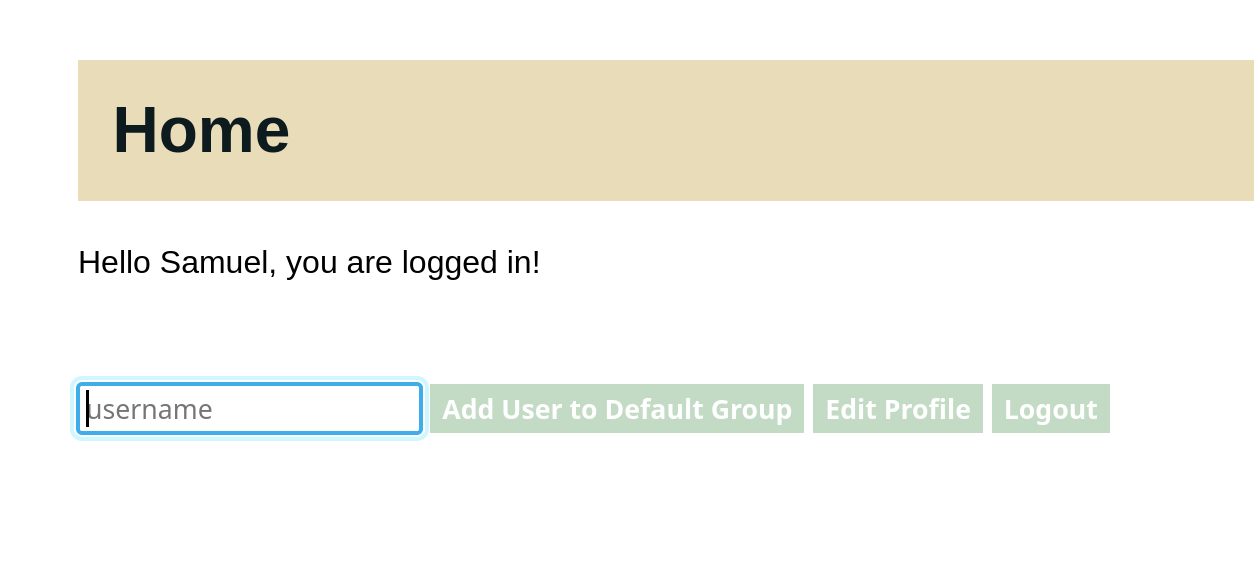
If you click on Logout, you should be redirected to the login page once more, since the access token was revoked through the use of KeycloakOpenID.logout. Now, remember that we created another user that didn't belong to any groups? If you try to login with that user, you'll get a JSON response saying:
{"detail": "User doesn't have access to the application"}
So, that proves that the role validation is working. But remember that your other user had read and write roles. The write role is used in this application to add an user to the read group. So let's login again with the previous user. If you get stuck in the user without access, you can go to Keycloak and, under Sessions, identify the session for your user, click on the three vertical dots and sign the user out.
Now, you are ready to sign in again with the write-enabled user. Once you do that, you'll see that you have the username text field, along with a button saying Add User to Default Group. Type the second user's username and click on the button. If no error message was displayed, you should have added your user to the fastapi-keycloak-read group. To verify that, you can go to the user's detail page in Keycloak and make sure that the fastapi-keycloak-read group is displayed under the Groups tab.
And that's it! If you try to login again, you should be able to see the application's page with your other user. And, just to make sure that the write role works, try to add any user into the username text field and clicking the button. You should see an error message saying User doesn't have access to the resource. And that's it for role validation and Keycloak management API!
¶ Other Identity Providers and User Federation
Integrating Keycloak with other IDPs isn't hard. You can use a plethora of social login providers such as Google, Facebook, Instagram, Github, LinkedIn etc. You can also user another OIDC provider - meaning you could, for instance, use another realm from the same Keycloak server. For user federation, you can use LDAP (including Active Directory) and Kerberos.
I'll focus on adding another realm as one possible identity provider. Let's say you have two realms: one is internal (for your company's employees) and the other is application (which provides access to a portal that is accessed by your customers). It is nice to keep them separated, since the application users should never have access to internal applications. On the other hand, you might want your company's employees to have access to the customer portal for administration or support purposes. Creating two users in different realms would not make sense, since it's prone to error and you loose the single sign on capabilities of being in the same realm. So you can add the internal realm as an identity provider inside the application realm.
Assuming you have both realms already created and configured, and that your keycloak server is under the root URL of http://keycloak.server.local, let's start by creating a new client under the internal realm called internal-to-application. This client will be used to proxy authentication requests from the application realm broker to the internal realm. As such, you should configure the root and admin URLs as http://keycloak.server.local/realms/application/broker/keycloak-oidc/endpoint. Add http://keycloak.server.local as web origin and http://keycloak.server.local/realms/application/broker/keycloak-oidc/endpoint/* in valid redirect URIs. Make sure to enable authentication, as well as Service account roles for this client.
Now, to create a new IDP, go to the application realm and go to the Identity Providers section. Add a new Keycloak OpenID Connect provider. Give it an alias (e.g., internal-to-application) and add http://keycloak.server.local/realms/application/broker/keycloak-oidc/endpoint as the redirect URI. The display name is what will appear to your users when logging as an alternative login provider. Let's say it's called Login with mycompany.com.
As for the OpenID Connect settings, here's the values you'll use:
- Authorization URL:
http://keycloak.server.local/realms/internal/protocol/openid-connect/auth - Token URL:
http://keycloak.server.local/realms/internal/protocol/openid-connect/token - Logout URL:
http://keycloak.server.local/realms/internal/protocol/openid-connect/logout - User Info URL:
http://keycloak.server.local/realms/internal/protocol/openid-connect/userinfo - Issuer:
http://keycloak.server.local/realms/internal - Validate Signatures:
On - Use JWKS URL:
On - JWKS URL:
http://keycloak.server.local/realms/internal/protocol/openid-connect/certs - Use PKCE:
Off
For Client authentication, use Client secret sent as post. And finally, for client ID and secret, use the ones fro the internal-to-application client you created before. And that's it! now, when you try to login to the application realm, you should see a new button + text Login with mycompany.com:
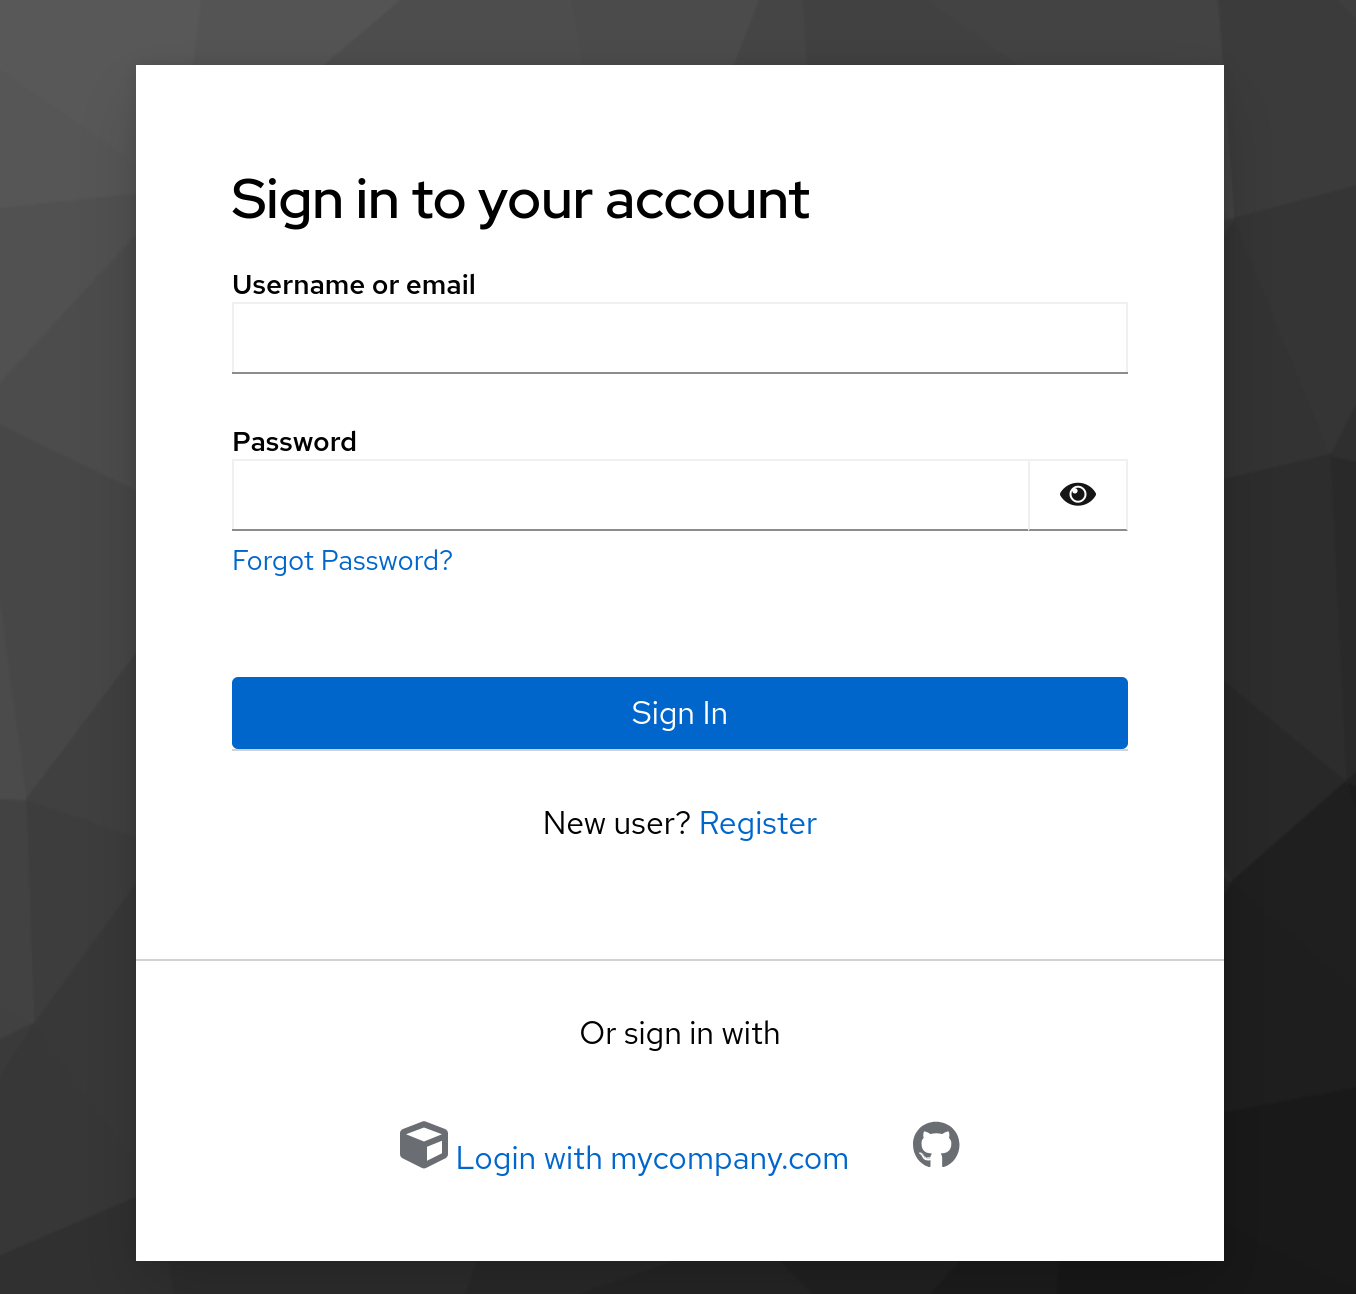
If you click it, you'll be redirected to the internal realm, and could user an internal user to log into the portal! There are also several other configurations you can use, such as mapping roles and/or groups from one realm to another. Yes, Keycloak is that flexible.
¶ Service Accounts
In Keycloak, it is possible to use a client service account so that an application can also authenticate with it, either to interact with other aplications in the same realm or have a limited interaction with realm administration itself. Here's how to do it:
¶ Enabling a Service Account
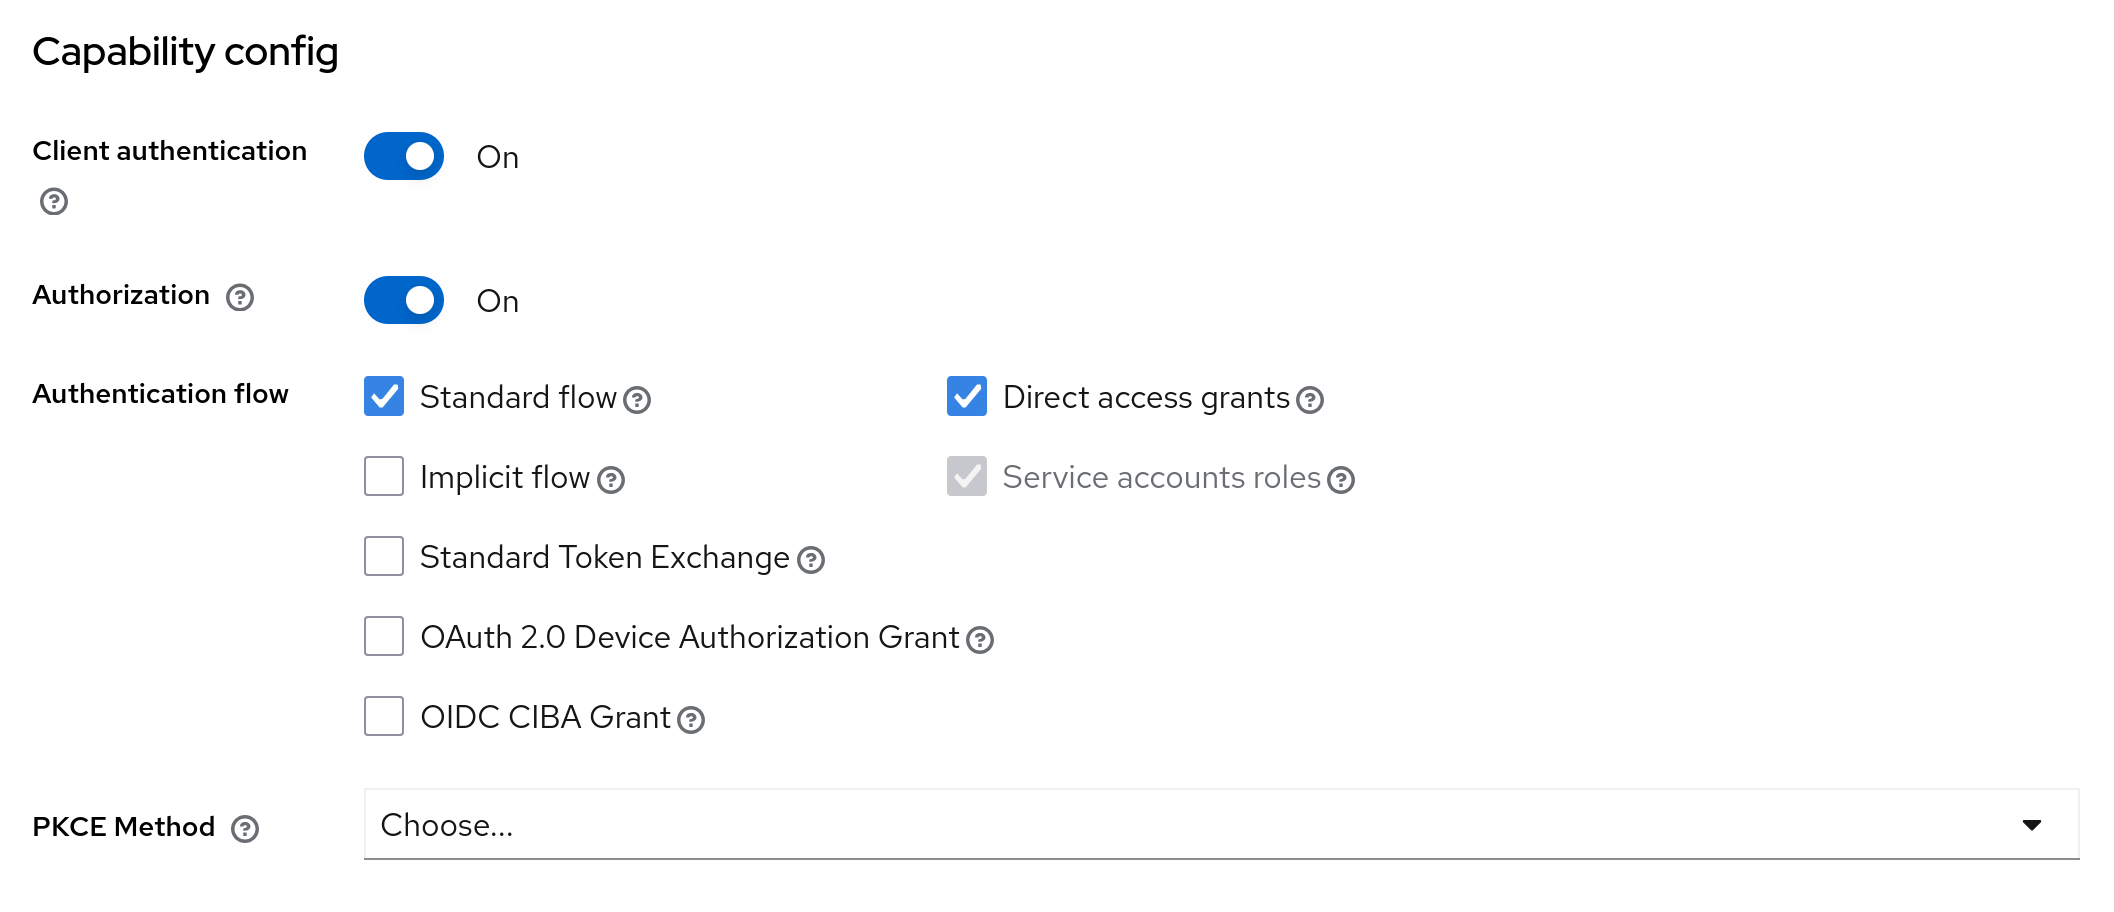
To enable a service account in your app's client, in the settings tab, enable Service account roles if not already enabled (this is also selected by default if you enable Direct access grants:
¶ Example: Allow App To View Realm Users
- Create a new group in your realm, and map the the
realm-management'sview-usersrole. - Go to your app's client and click on
Service account roles - There, you should see an info message saying something like
To manage detail and group mappings, click on the username service-account-yourclient. Click on the link for the username. - Finally, assign the group you created to this user under the
Groupstab.
Now, you can test that this is working by getting a token with the grant type client_credentials, and using this token for listing a specific user:
ACCESS_TOKEN=`curl -L --insecure -s -X POST \
  -d 'client_id=my_client_id' \
  -d 'client_secret=my_client_secret' \
  -d "grant_type=client_credentials" \
  'http://keycloak.server.local/realms/application/protocol/openid-connect/token' | jq -r .access_token`

curl -s -H "Authorization: Bearer $ACCESS_TOKEN" \
  "http://keycloak.server.local/realms/application/users/0978318f-09b6-464e-8f1c-f5912e38394b" | jq .
This would give the details for the user with id 0978318f-09b6-464e-8f1c-f5912e38394b, even without a login token from this user:
{
  "id": "0978318f-09b6-464e-8f1c-f5912e38394b",
  "username": "user",
  "firstName": "Samuel",
  "lastName": "Joaquim",
  "email": "user@test.com",
  "emailVerified": true,
  "enabled": true,
  "createdTimestamp": 1759767924531,
  "totp": false,
  "disableableCredentialTypes": [],
  "requiredActions": [
    "UPDATE_PASSWORD"
  ],
  "notBefore": 0,
  "access": {
    "manageGroupMembership": false,
    "view": true,
    "mapRoles": false,
    "impersonate": false,
    "manage": false
  }
}
¶ Admin API
If you need fine grained control over your whole Keycloak server from an app (e.g., an application that handles account registration), you can use Keycloak's admin API using your master realm with the admin-cli client.
This is a very powerful account, so use it carefully. If you don't want to provide all admin capabilities to an app, but rather control a single realm, try the Service Account approach as in the previous section, giving the minimum
realm-managementroles required.
Here are the docs for the the Keycloak admin API.